PAINT CARTONS USING
STENCILS WITH YOUR COPY, ARTWORK, OR DESIGNS IN MINUTES, FOR PENNIES!
Welcome to Carton Printing Stencils
Here is a great New Way to Save Time and Money by Printing your own Shipping Cartons or Boxes in just Minutes!
Now you can simply buy cheap UNPRINTED stock cartons or shipping boxes and then Quickly and Easily Print them in your own shop or plant with Any Copy you can make on your computer. This can be Trademarks, Artwork, Text or even your Company Logo.
It could also be product contents, instructions or any other information you wish. And it can be done in ANY COLOR in Minutes using the New Universal Stencils that can be used Hundreds of times and even stored for Re-use later.
What is the New Stencil System?
This is a Revolutionary New Stencil-Making System that will allow you to create whatever logo, text or trademark you like on
all of your cardboard boxes or shipping cartons in any Color in just Minutes.
This is the Easiest to Use, Lowest Cost stenciling system on the market today and with it you can easily make your standard blank cartons look like they were printed Professionally and at a LOW COST that you can NOT BEAT.
Best of All, this can be done by almost anyone in your plant. This is New and is not available anywhere on the Internet at prices that are even close to these Special Limited Time Low Prices.
How Does it Work?
This system is so easy to use that you will have virtually No Training Costs. You simply Create your Text Copy or Design on any computer, using software that you already have and use your regular printer to print the design out on a transparency film (which is included in the kit.)
Then use a Stencil Maker to transfer the transparency onto the stencil material in 2 to 3 minutes. Develop the stencil, and you've got a Re-usable Stencil that will professionally print your cartons for less than a penny per box!
What Can It Do For You?
 |
Save You Time, Save Money, Give You Free Advertising and Make Your Boxes and Shipping Cartons Look Professional. How about doing all of that in a few Minutes and for less than a penny per box? |
You can stencil whatever color you want, even in multiple colors! Add "Fragile" logos, or Haz-Mat warnings, or even contents to each box, making Shipping and Receiving Easier. You could even stencil your barcode on the side of each box. The Possibilities are Endless.
Best of all, this same stencil can be used for Thousands of Other Uses in your plant, shop or office because it can be used to Etch Metal Parts or Tools, Etch Glass, Ceramic or with Ink or Paint it can be used on Wood, Plastic, Leather, Paper, Tile, Fabric (Like T-Shirts) or almost anything else that will take Paint or Ink.
Step 1 - Print Your Transparency
 |
You can put any kind of copy or artwork on your Cardboard Boxes (Including Trademarks) in minutes.
Simply put the copy on your computer and print out on the transparency sheets provided in your kit like shown at left. |
Step 2 - Expose Your Stencil
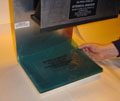 |
Now cut a piece of unexposed stencil material from the silver envelope to the appropriate size and place on the black pad in your exposure unit.
Take your transparency sheet with the copy and place on top.Then cover with the glass plate and expose for two minutes. |
Step 3 - Peel Back the Mylar (Both Sides)
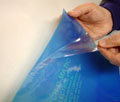 |
After exposure remove the stencil from the exposure unit and then peel the Mylar cover sheets from BOTH SIDES of the stencil. |
Step 4 - Apply Activator, then Etching Cream
 |
Next place the stencil in the developer solution and let it sit for about a minute. Then take one of the white sponges and gently rub the stencil where the copy shows. |
Rub on both sides of the copy until it becomes very WHITE. It is then ready for use.
Step 5 - Rinse Stencil Completely
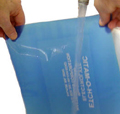 |
Rinse the stencil under warm water until the developer is completely cleaned off.
You can tell this when the stencil is not slippery any longer. |
Step 6 - Blot Dry Your Stencil
 |
Wipe the stencil off to remove the excess water and then hold stencil up to the light to be sure that it is completely developed.
There should be no Blue in the White letters or copy. If so then simply put back in the developer until the whole stencil copy is white. |
Step 7 - Blow Dry Your Stencil
 |
Put stencil on a paper towel and "Blow Dry" it with a hair dryer for a few moments on both sides.
It is easier to handle this way and this is also the best way to "Store" stencils after use. |
Step 8 - Stencil Frame
 |
You may want to attach a frame to your stencil to make it easier to handle. (This is NOT absolutely necessary since a lot of times it is just as easy to use the stencil without a frame). |
We have Oak Stencil Frames available that work much better than the plastic ones shown.(See Below) Attach the stencil to the frame with cellophane tape on the edges.
Step 9 - Apply Ink to Stencil
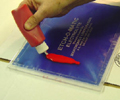 |
Put the proper ink on your stencil (Or on the Squeegee).
Be sure you use enough ink or paint so that all the letters or copy on the stencil "Fills" and you do not get voids. |
Step 10 - Use Squeegee
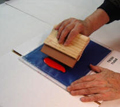 |
Use a squeegee to evenly apply the ink or paint. Be sure that the width of the squeegee is wide enough to cover all of your copy so you DO NOT have to make a SECOND stroke. |
A second stroke can sometimes make a print that is over inked in the middle.
Step 11 - Hold Stencil Firmly
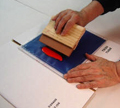 |
Now pull squeegee across the carton in one smooth pass using
about a 45 degree angle and moderate hand pressure.
It is best to practice once or twice on scrap cardboard to get the "feel" of operating the squeegee and be sure the stencil is working perfectly. |
After a couple of tries you will be an Expert.
Step 12 - Pull Squeegee Across Stencil
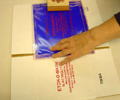 |
If you want to print on two sides of the carton simply move the stencil over and draw the squeegee across it again.
It should easily have enough ink on it for several marks. |
Step 13 - Lift Stencil up Gently
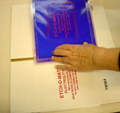 |
Note: Be sure when lifting the stencil that you are careful since the ink is wet and can smear easily. Therefore hold one edge and gently lift the opposite edge up and away from the wet ink. You will have a perfect mark then every time. |
Print on All Sides of Cartons
 |
Here is a carton that is printed on only one end simply as a sample.
Printing on all four sides will require you to wait for several minutes or so until the first side dries. |
Single Shipping Box/Carton
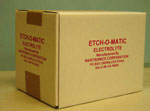 |
Your printed cartons will look like this (Or Better) and can have more than one color and can be printed with graphics and on all edges including the flaps if you wish. |
Simply make the stencils larger to cover the larger area needed.
Multiple Cartons
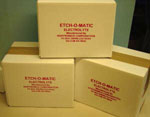 |
One stencil will print hundreds of boxes and can be cleaned, dried and stored to use over and over again. You can also use the same stencil and change the paint or ink color. |
Wash & Reuse!
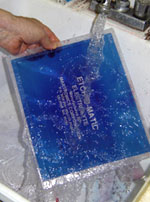 |
When finished simply clean up with water. If the stencil is a little "Plugged Up" because some of the ink has dried in it you may want to use a little white sponge and gently rub the area.
It is best to NOT LET THE INK DRY in the stencil and you can prevent this by quickly going from one box to the other without waiting long periods between boxes allowing the paint to harden. Blow Dry stencils after use for best storage. |
Limited Time Offer - Stencil Maker Kits
Be Sure And Take Advantage of the Special Low Prices on these New Kits during this Limited Time Offer. Simply decide on the actual Size of the Stencil you may want to use....such as 5"x 6" or 6"x 8" or 10"x 12" and let that help you decide on the kit you will find the most Economical for You.
Finished (Extra Strong) Solid Oak Stencil Frames
Three different sizes to help support your stencils when you apply paint with them.
3/4" x 6-1/2" x 8-1/2" (For 6" x 8" Stencils) $6.95 each - Order Here
3/4" x 8-1/2" x 10-1/2" (For 8" x 10" Stencils) $8.95 each - Order Here
3/4" x 10-1/2" x 12-1/2" (For 10" x 12" Stencils) $10.95 each - Order Here
Package of all 3 Strencil Frames (Save $4.90) $21.95 set - Order Here


-------------------------------------------------------------
Mark 440 Stencil Maker Kit
(Makes up to 4" x 6")
Contents:
- 1 UV Exposure Unit in Aluminum Frame Measuring 5"x6"x12 High, with Electric Cord, Switch & Special 365 Nanometer Ultra-Violet Bulb (120 Watts)
- 1 Aluminum Exposure Tray with Compression Foam & Glass Top
- 1-16 oz. Bottle Stencil Developer
- 1 Plastic Developing Tray with Lid
- 2 White Developer Sponges
- 1 Digital Timer
- 10 Unexposed Universal Stencils (5"x6" size)
- 5 Sheets Transparency Film (8-1/2" x 11")
- Complete Instructions
- BONUS - 2 FREE Samples of Universal Stencils for Practice
- BONUS - 1 FREE Sample Glass Etching Kit with Etching Cream
Industrial Price $249.95 ($80.00 Savings) 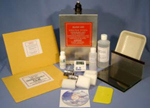
Special Price
$169.95

----------------------------------------------------------------
Mark 680 Stencil Maker Kit
(Makes up to 6 " x 8 ")
Contents:
- 1 UV Exposure Unit in Aluminum Frame Measuring 6 "x8"x12 High, with Electric Cord, Switch & a 1000 Hour Special UV Bulb
- 1 Aluminum Exposure Tray with Compression Foam & Glass Top
- 1-16 oz. Bottle Stencil Developer
- 1 Plastic Developing Tray with Lid
- 2 White Developer Sponges
- 1 Digital Timer
- 10 Unexposed Universal Stencils (6"x8" size)
- 5 Sheets Transparency Film (8-1/2" x 11")
- Complete Instructions
- BONUS - 2 FREE Samples of Universal Stencils for Practice
- BONUS - 1 FREE Sample Glass Etching Kit with Etching Cream
Industrial Price $349.95 ($100.00 Savings) 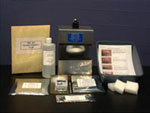
Special Price $249.95

----------------------------------------------------------------
Mark 1000 Stencil Maker Kit
(Makes up to 10 " x 12 ")
Contents:
- 1 UV Exposure Unit in Aluminum Frame Measuring 10 "x12"x12 High, with Electric Cord, Switch & a 1000 Hour Special UV Bulb
- 1 Aluminum Exposure Tray with Compression Foam & Glass Top
- 1-16 oz. Bottle Stencil Developer
- 1 Plastic Developing Tray with Lid
- 2 White Developer Sponges
- 1 Digital Timer
- 10 Unexposed Universal Stencils (10"x12" size)
- 5 Sheets Transparency Film (8-1/2" x 11")
- Complete Instructions
- BONUS - 2 FREE Samples of Universal Stencils for Practice
Industrial Price $399.95 ($100.00 Savings) 
Special Price $299.95

----------------------------------------------------------------
Wood Handled Squeegees

These New Squeegees are Perfect for use with your
Universal Stencils on almost Any Material.
3" Wide Squeegee $5.95 Order Now
4" Wide Squeegee $7.95 Order Now
6" Wide Squeegee $11.95 Order Now
Package of All Three - $21.95 Order Now
---------------------------------------------------------------
Acrylic Paint Starter Kit
(We have tested many acrylic paints - and these are the best!)

Regular Price $16.95
On Sale Today for $14.99 Order Here
They come in 4 colors: Red, Yellow, Blue & Black. They are water-based, non-toxic, non-clogging, highly opaque ink for cartons (shipping boxes), carboard, signs, paper, wood, posters, and fine art prints.
Do not use on metal, plastic, or fabrics that are to be laundered. (Fabric Paints Below)
---------------------------------------------------------------
Fabric Paint Starter Kit
They come in six colors: Red, Blue, Yellow, Green, Black & White.
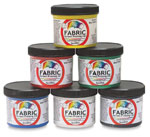
Regular Price is $23.95
On Sale Today for $19.95 Order Here
Important Note: Speedball Water-Base Textile Screen Printing Inks are great for light-colored cotton, linen, blends, polyester, rayon, and other synthetic fibers (except nylon).Use the process colors for 4-color process printing. Speedball textile inks can also be applied to tote canvas bags, aprons, T-shirts, etc. All garments should be pre-washed and the process pre-tested before a production run. After printing, allow to dry and then heat set with a household iron at medium setting for 3 to 5 minutes on each side.
---------------------------------------------------------------
Acrylic Paint Retarder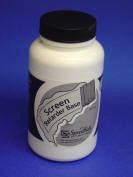
This can be used with Both of the Paints listed above to keep the stencil from clogging after continued use and to make it easier to clean the stencil after use.
It is recommended for use if you are going to do long run printing on either fabric or most other materials.
8 Ounce Bottle Regular Price $ 9.95
On Sale Today for $8.95 Order Here
---------------------------------------------------------------
Martronics
Corporation
PO BOX 200/500 Wilcox RD, Salkum, WA 98582
Ph:800-775-0797
Fax:360-985-2996
Email
---------------------------------------------------------------
Craft and Paint Testimonials
Hi Martronics:
Just wanted to let you know that we used one of your fancy new
stencils and applied Military Letters and Numbering to an U.S. Army
Abrams M-1 Tank using EPOXY Paint. We know the stencils are NOT
designed for that type of paint but it worked Great and saved us a lot
of time and hassle. The Army even liked it. Thanks,
George O'Brien, Boston, Ma.
---------------------------------------------------------------
Dear Martronics Corporation:
Thank you for the cool idea on making T-Shirts. We printed
shirts for all of the students that took part in our soccer program this
year. It worked out fine. Each student simply brought in
their own T-Shirt and we screened on the school name and team name in a
jiffy. The students got to watch their shirt being screened and
learned a lot. On the plus side we saved a ton of money that more
than paid for the kit on the first use. Everyone thinks that is
Great!
Thank You, Gloria Wilson, George
Washington Elementary, Portland, Oregon
---------------------------------------------------------------
To Martronics Corp.:
We appreciate your telling us about your silkscreen type cardboard
box printing stencil system. It works slick and we are now using
it just about once a week to print various info on our cartons and to
put our company trademark on most of the larger shipping cartons.
This actually does save money and time even tho we were not really
convinced of it in the beginning. But once we got the hang of it
we can do our cartons in minutes and they do look very good.
Sincerely, Joe Brady, Pres., J.P. Nolan & Company, Los Angeles,
Calif.
---------------------------------------------------------------
Dear Marie:
Thanks for the idea of "blocking off" parts of the stencil so that we
can paint different colors without making several stencils. This
sure saves time and does a good job. The trick is in the non stick
tape which comes off easily and does not ruin the stencils. We
appreciate the Tip. It is hard to find a company now that will
actually talk to you on the phone and spend time helping you.
Thanks again,
Shirley Sanders,
Seattle, Wa. 


